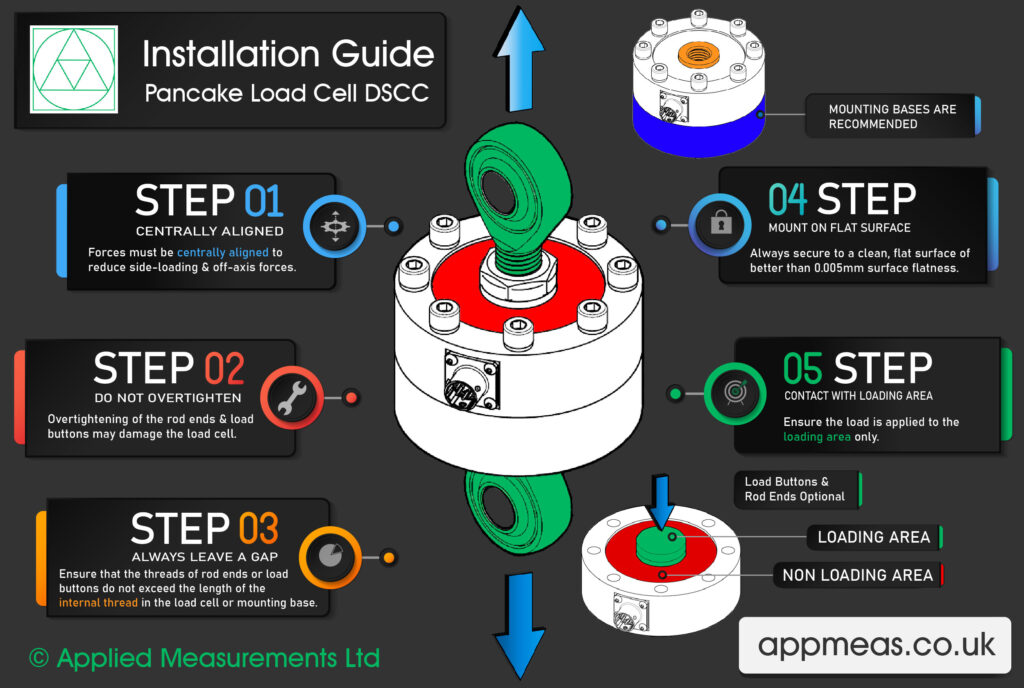
Our Applied Measurements experts have put together a 5-step guide to demonstrate how to correctly install a pancake load cell DSCC.
Step 1 – Keep the Forces Centrally Aligned
To reduce any off-axis loading, forces must be centrally aligned through the centre of the pancake load cell. We can supply optional load buttons and rod ends which work to reduce any side loading.
Step 2 – Do Not Overtighten the Rod Ends and Load Buttons
When using rod ends and load buttons be sure not to overtighten them when attaching them to the pancake load cell. As this can cause damage to the load cell.
Step 3 – Always Leave a Gap
Ensure that the threads of rod ends or load buttons do not exceed the length of the internal thread in the load cell or mounting base. If a gap is not maintained, the sensing section of the load cell will not be able to move freely when a tensile or compressive force is applied, leading to erroneous readings and potential damage.
Step 4 – Mount on a Flat Surface
Always secure the pancake load cell to a clean, flat surface of better than 0.005mm surface flatness.
Step 5 – Contact with Loading Area Only
When installing the pancake load cell ensure the load is applied to the loading area only.
Need Additional Support?
If you need some additional support or advice on installing your pancake load cell, please contact our technical team. We’re always happy to help.
Why Us?
- Suppliers of top quality strain gauge sensors and transducers to every corner of industry – UK and worldwide
- Over 100 years of expert transducer knowledge
- Our high quality products all come with a 3 year warranty


